
Adding new users
AdminInvite people to your organization and see where each invitation stands.
Overview
As an organization admin, you can invite people to join your WethosAI platform. This guide walks through the process of adding a user, what happens after the invitation is sent, and what the new user needs to do on their end.
Note: This functionality is only available to users with an Admin role.
Access Admin mode
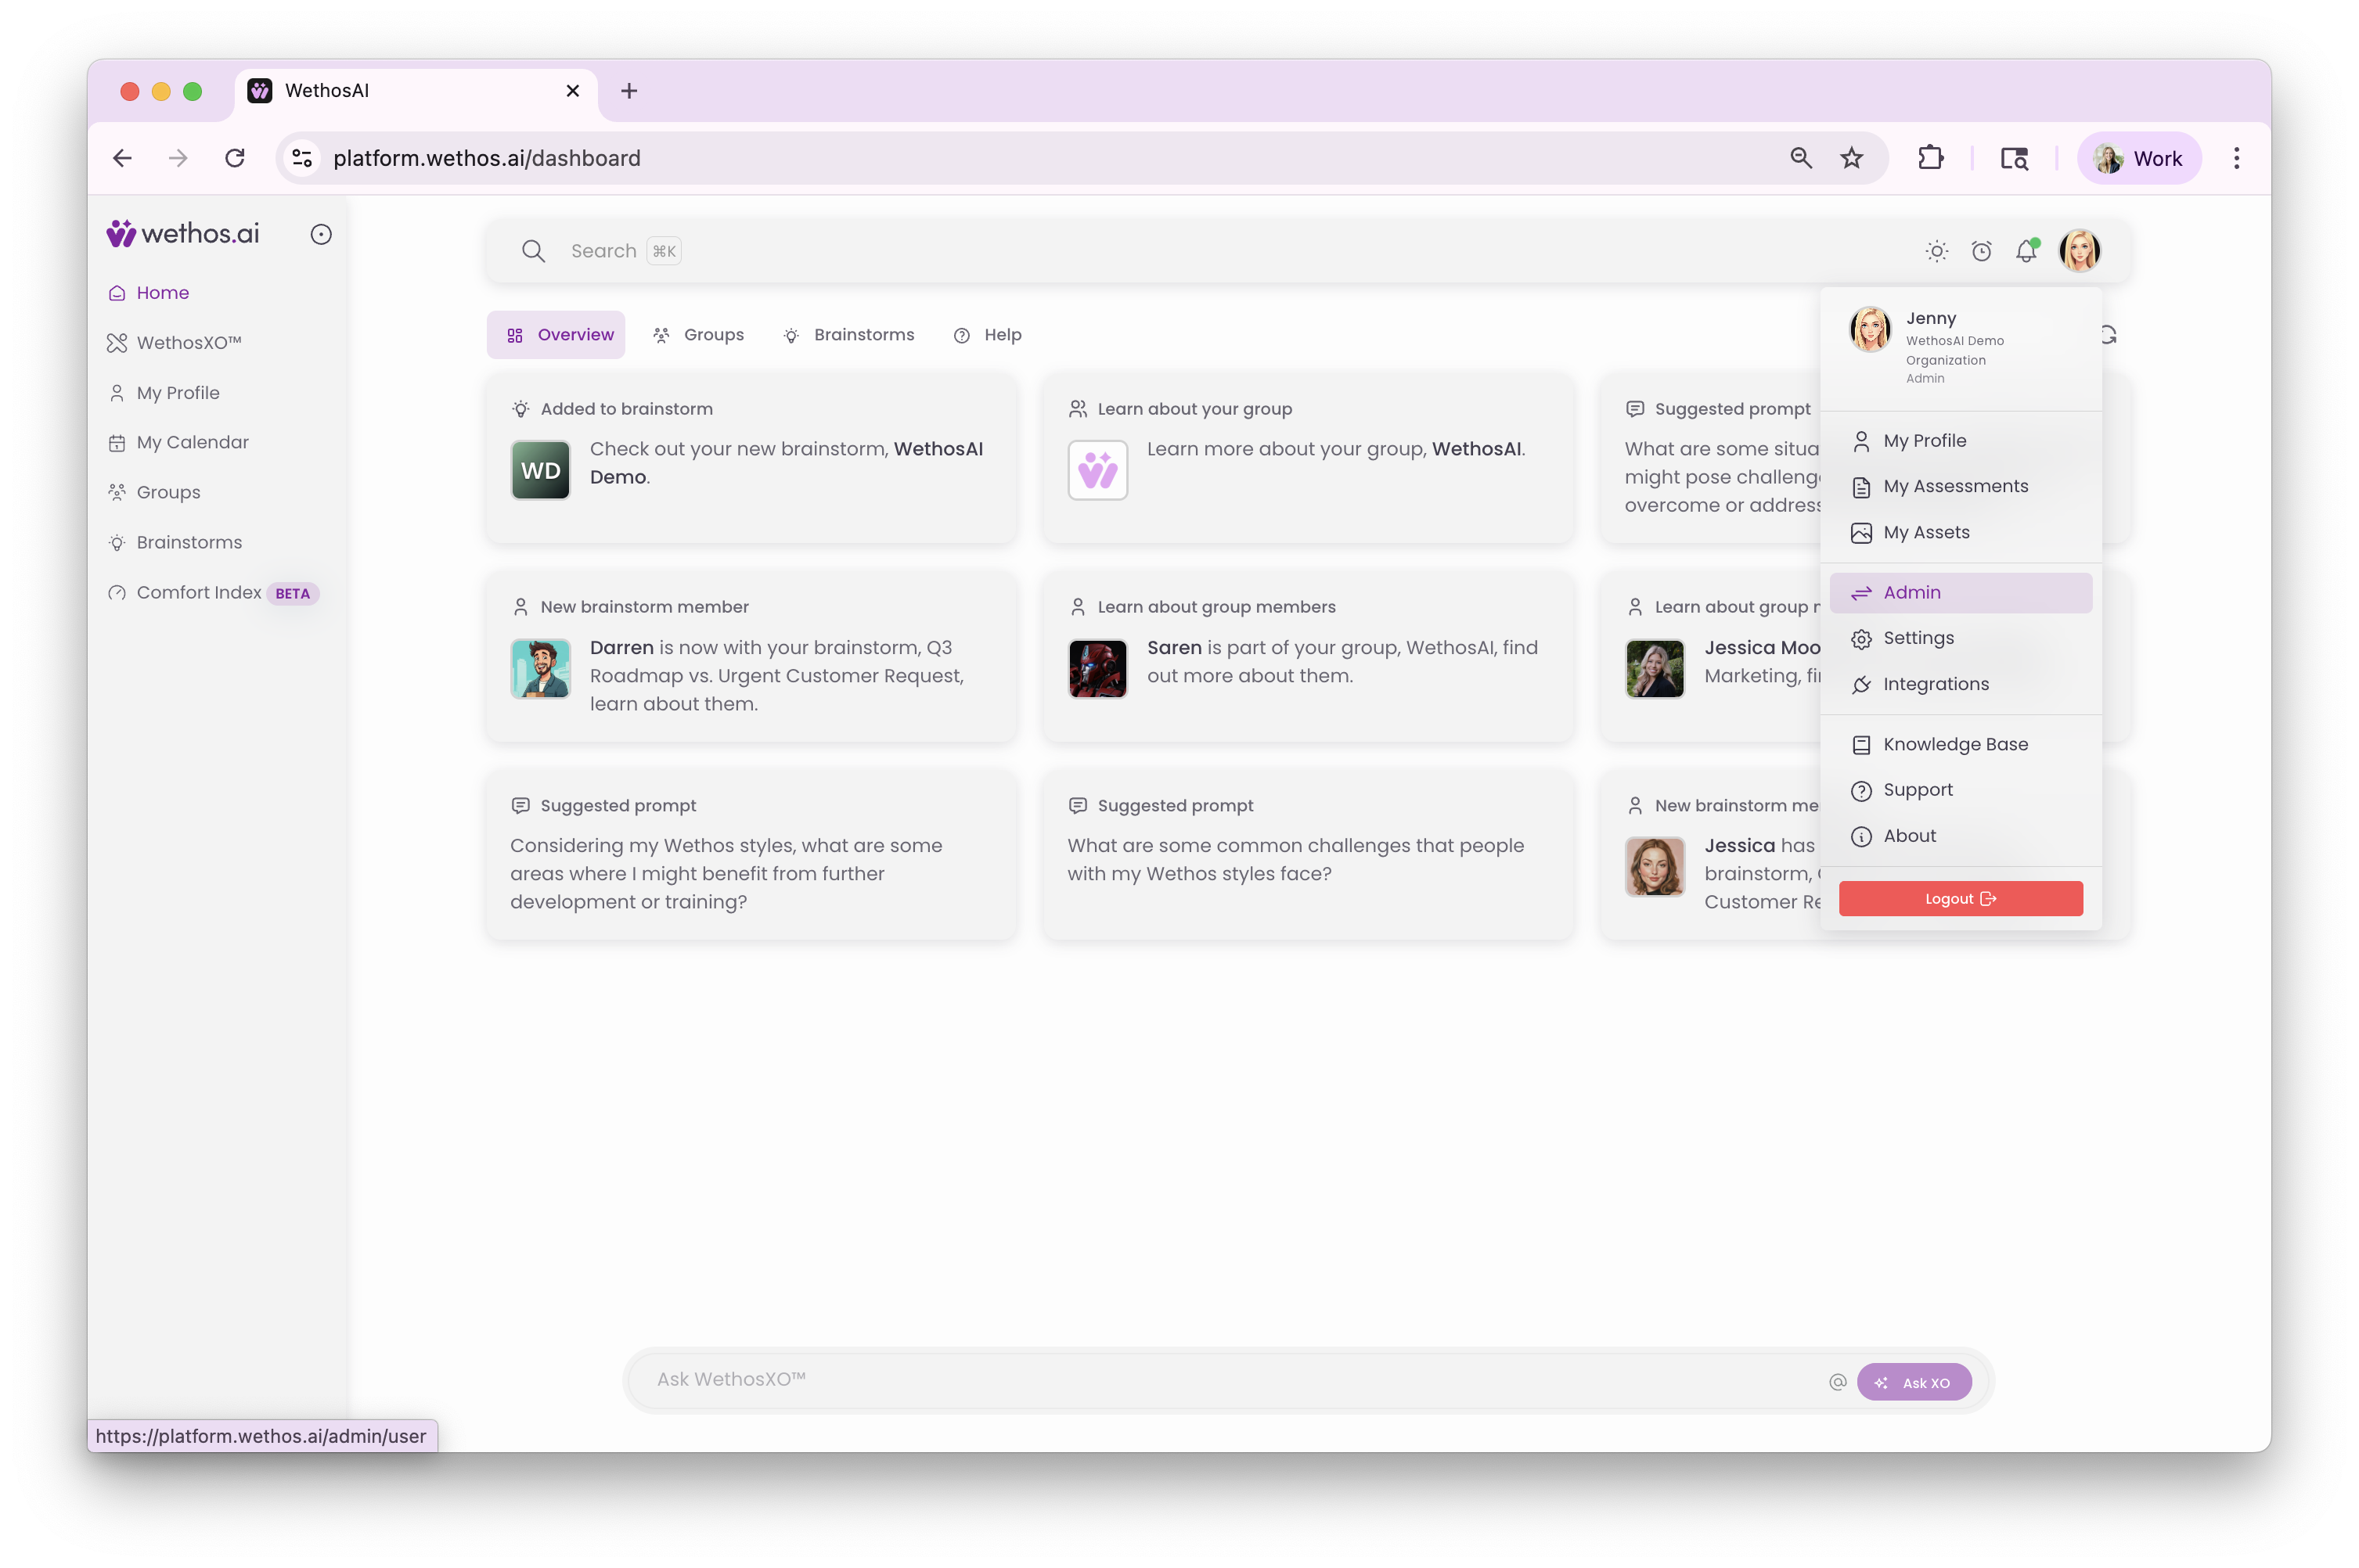
Click your profile icon in the top-right corner of the platform and select Admin to enter the Admin panel. If you're already in Admin Mode, you'll see the purple "Admin Mode Enabled" banner at the top of the screen.
Navigate to Manage Members
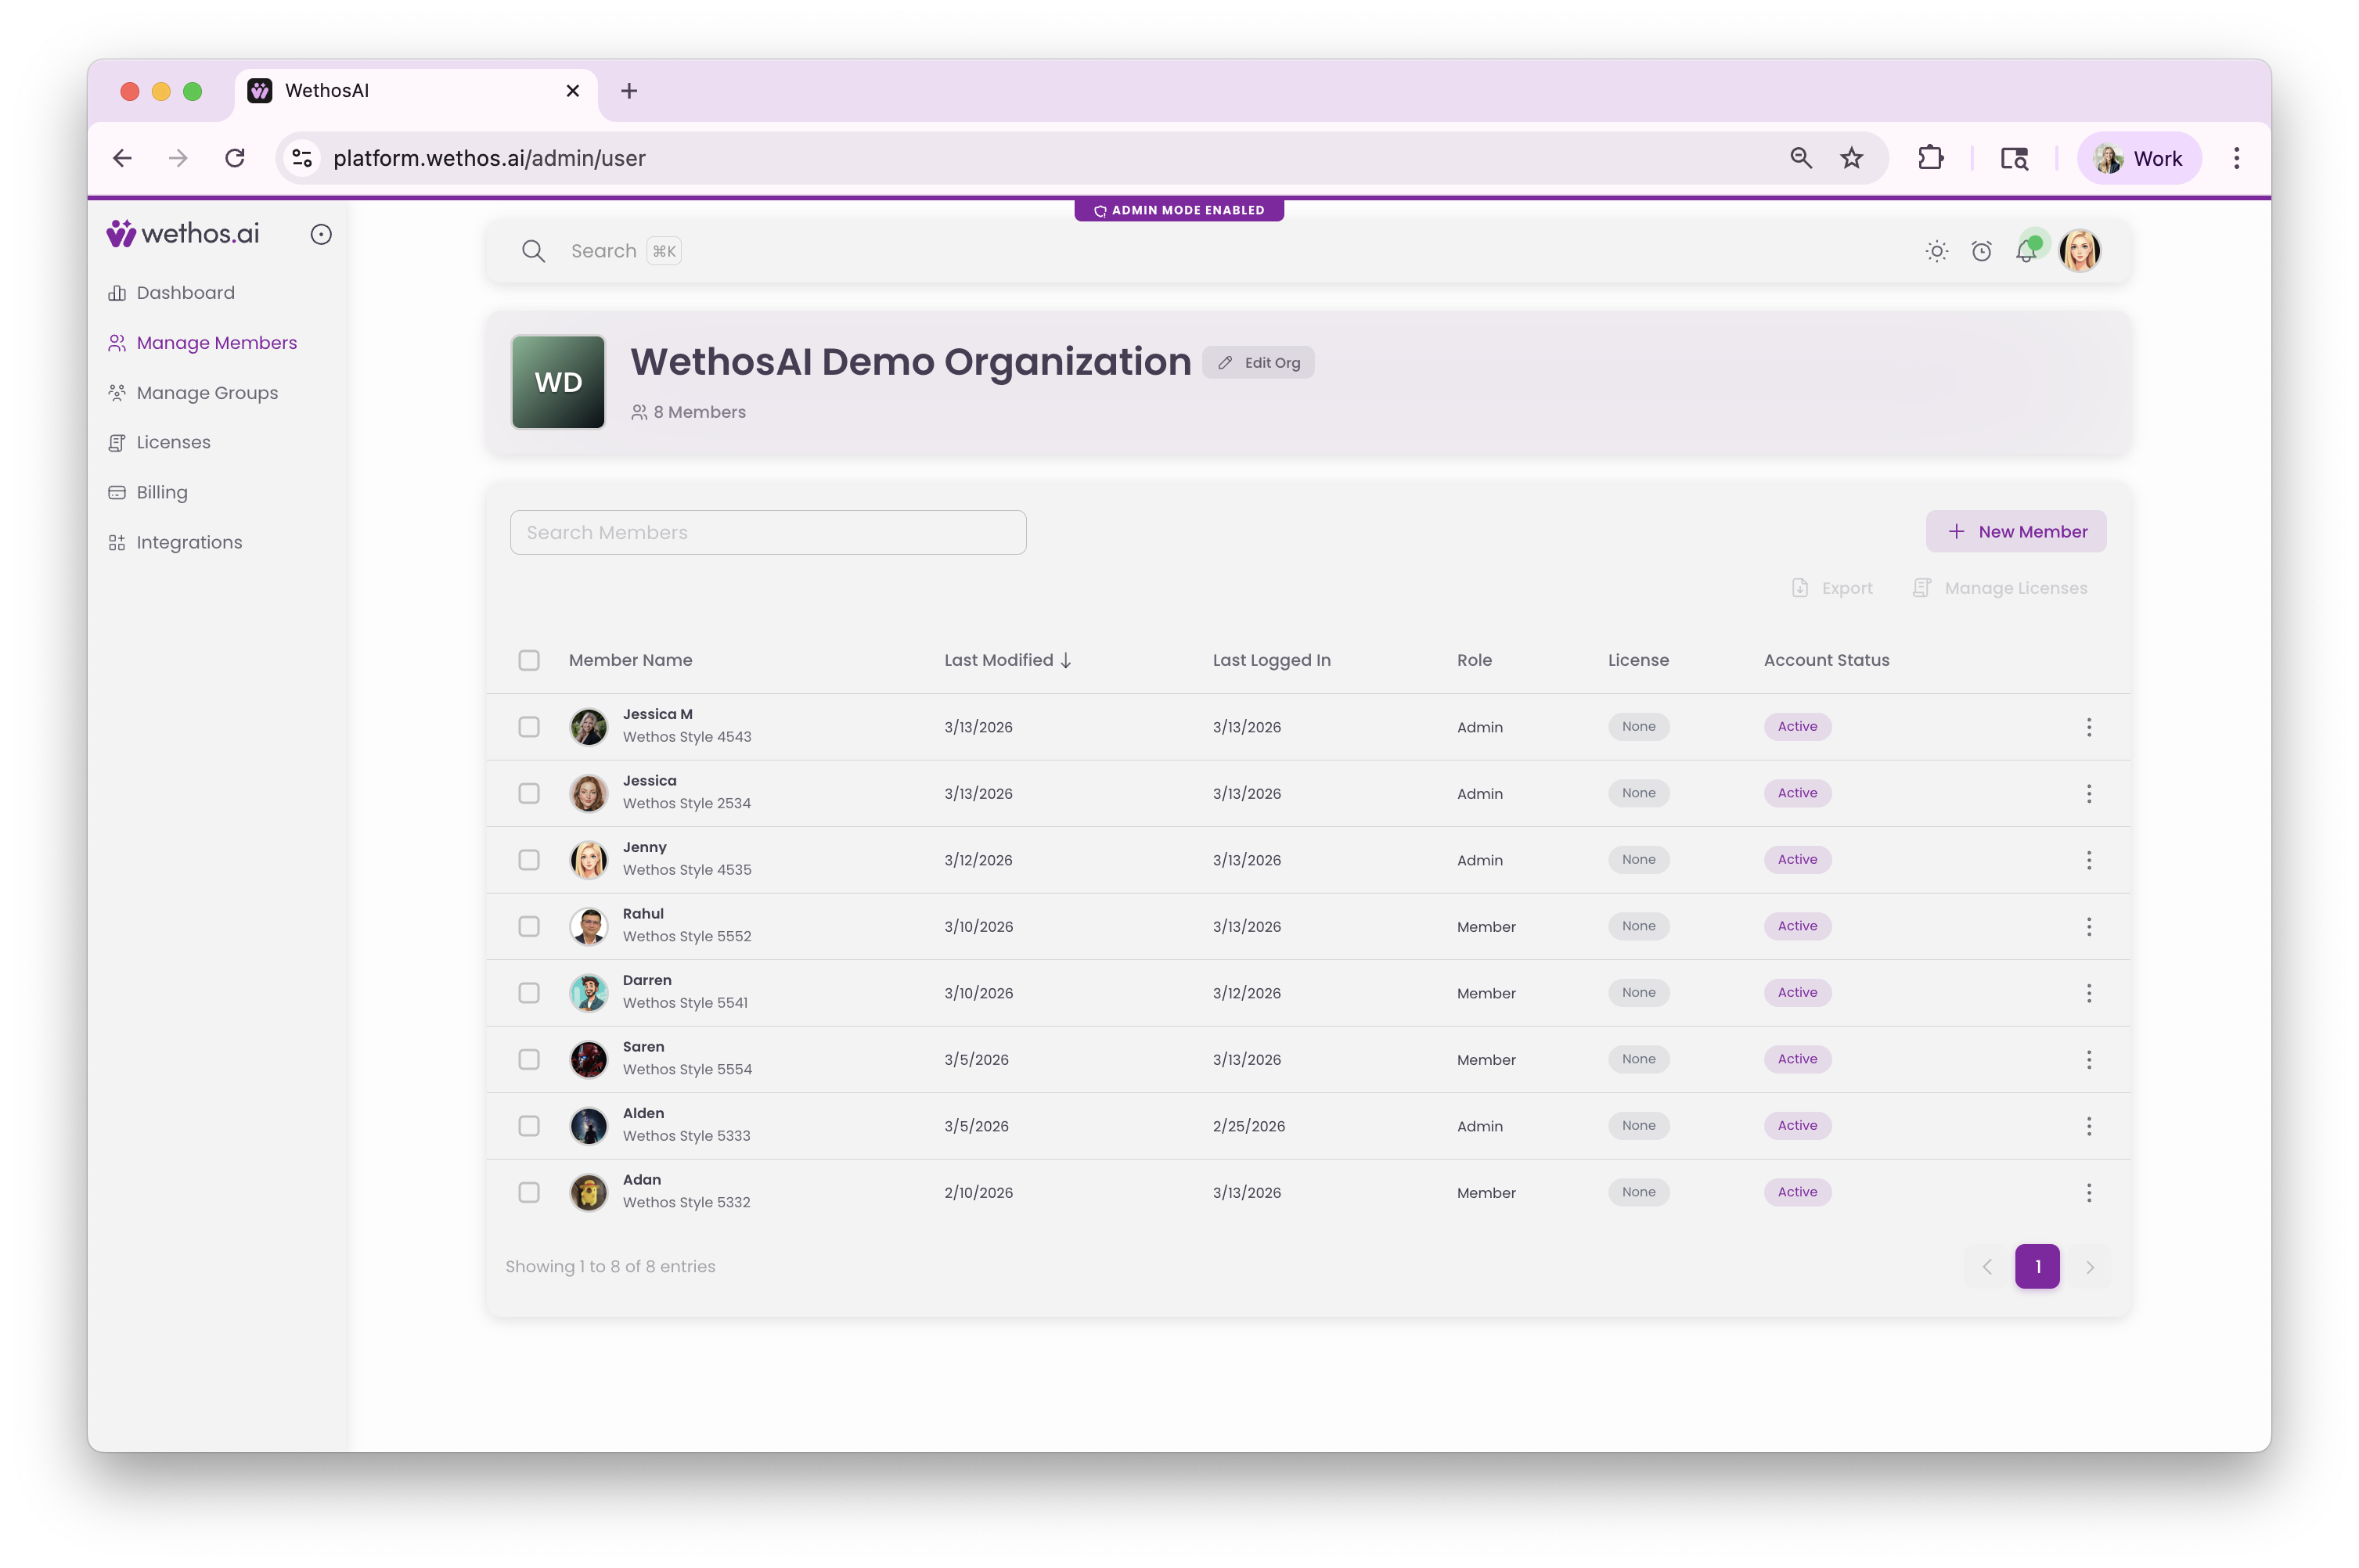
In the Admin panel's left-hand navigation, click Manage Members. You'll see your organization's member table showing all current users.
Click New Member
Click the + New Member button in the top-right area of the member table.
Fill in the required information
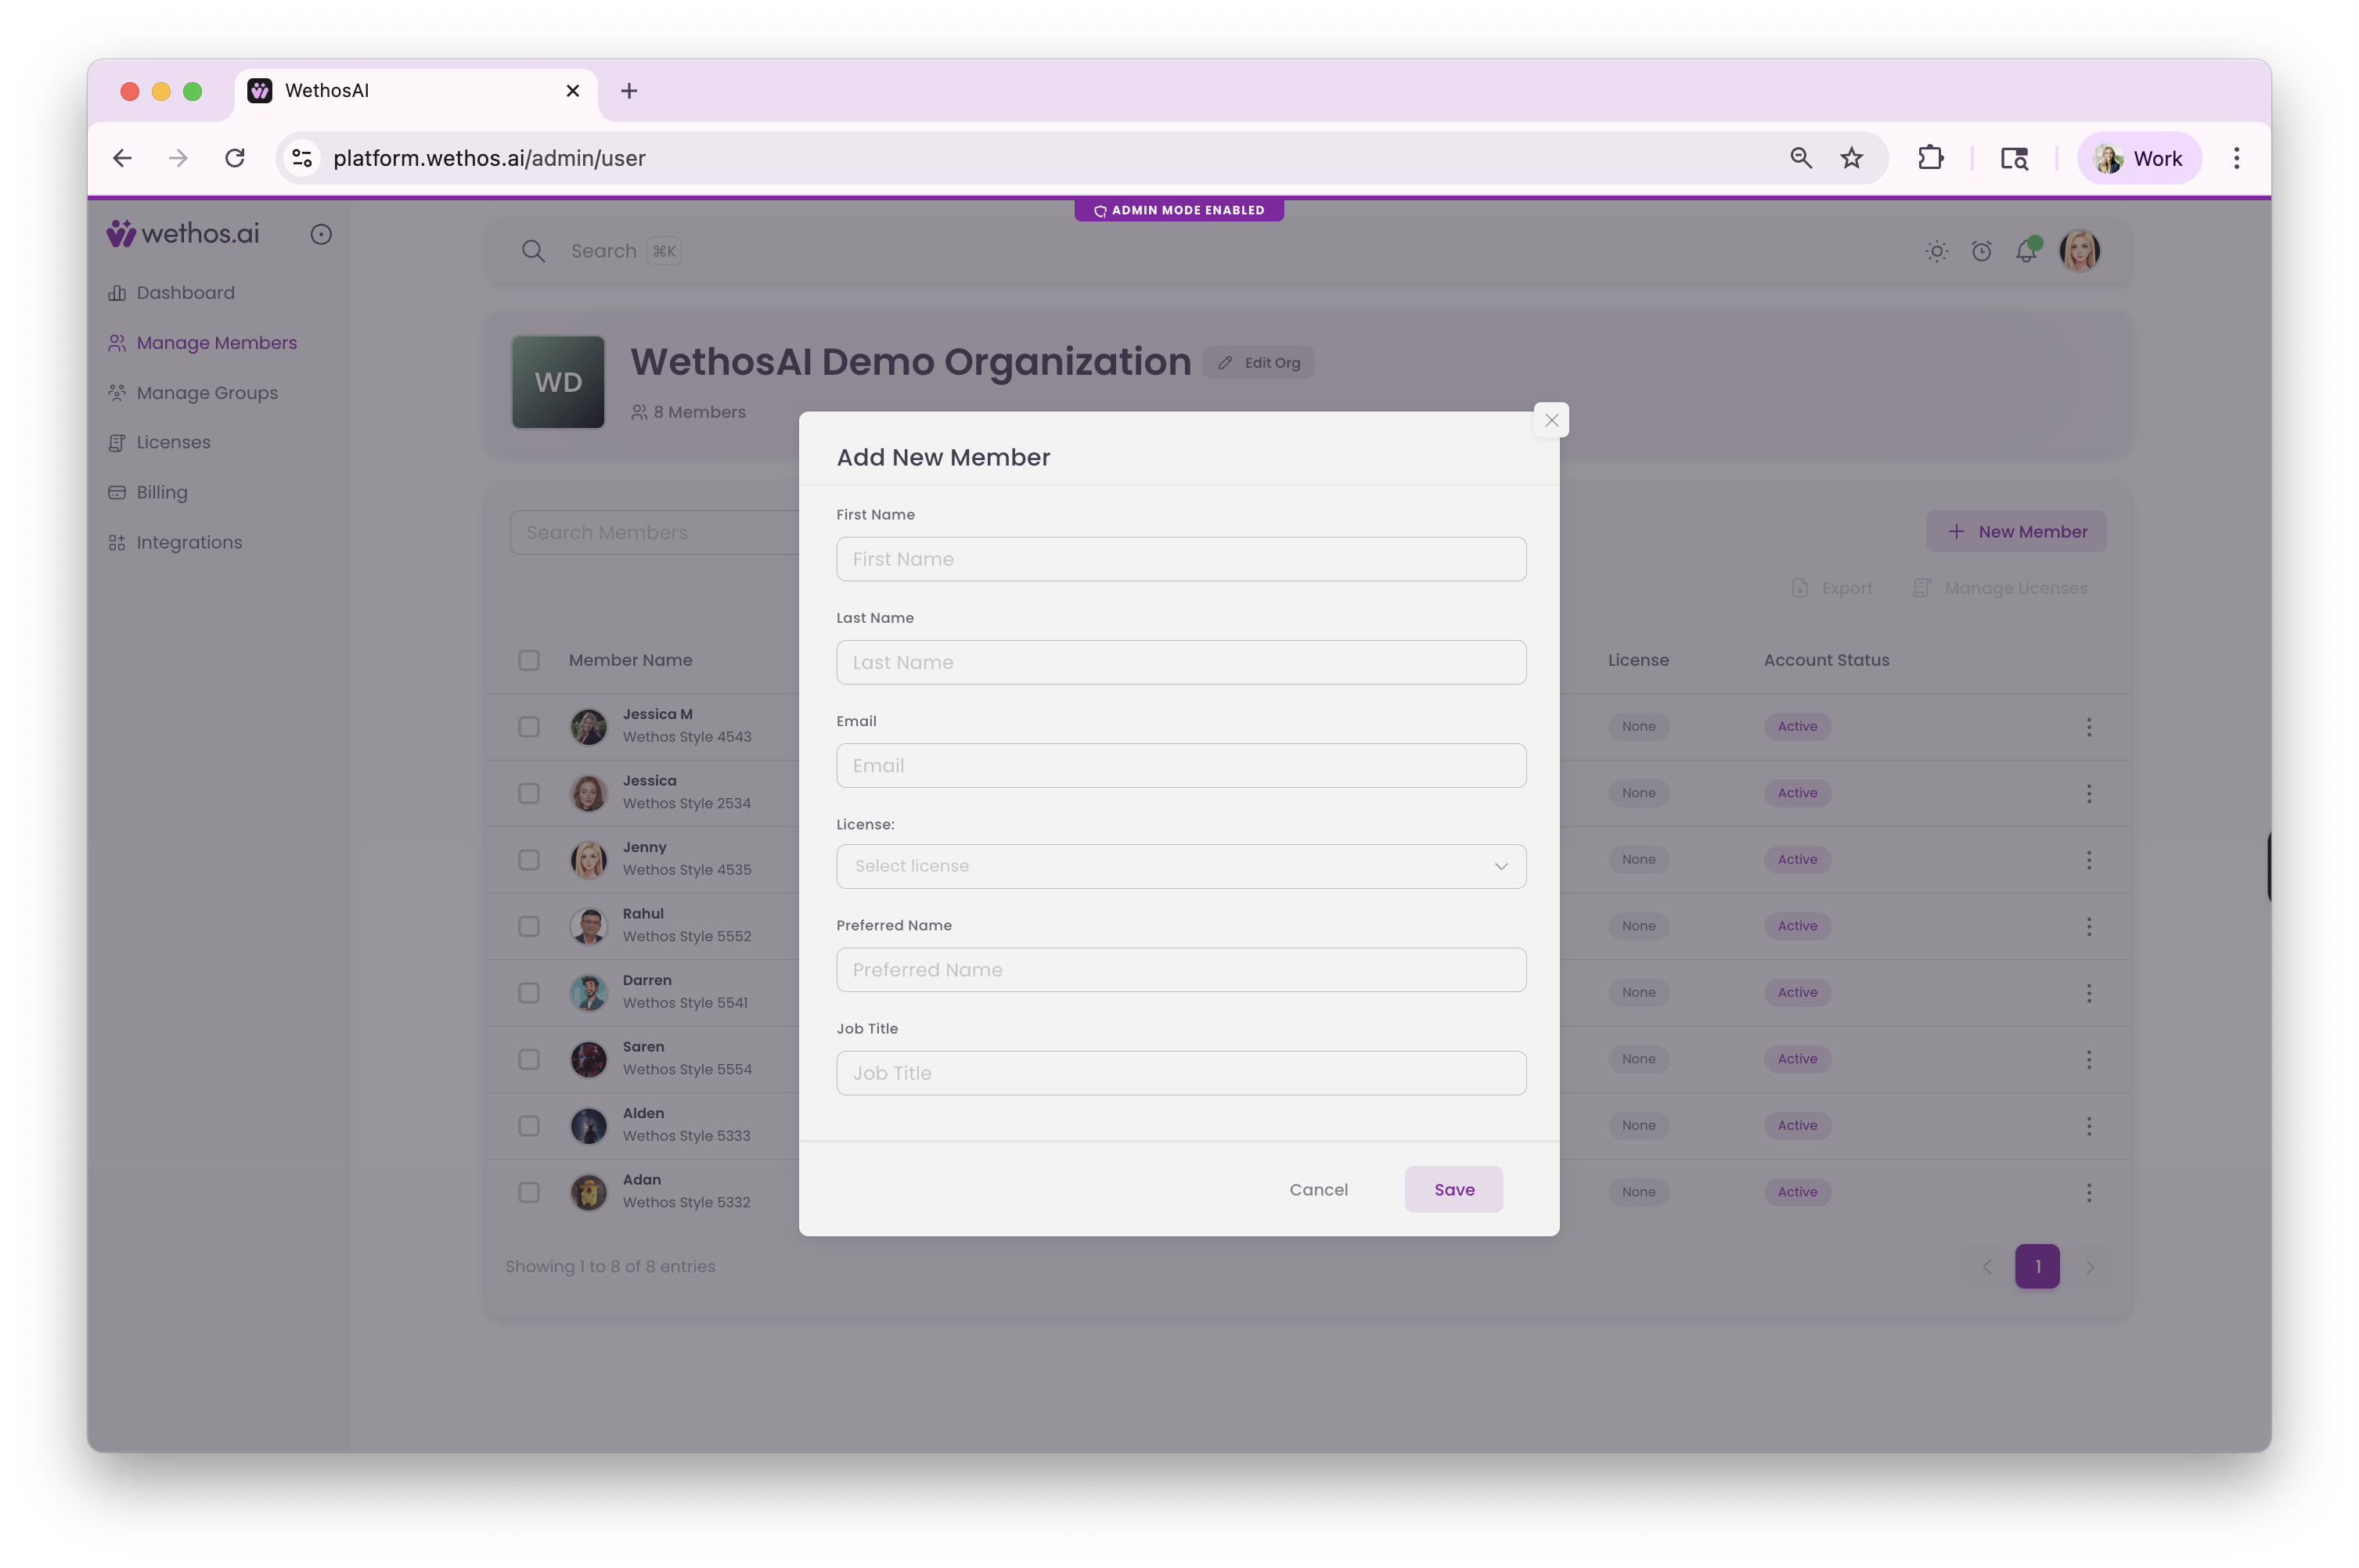
Enter the new user's details. Some fields are mandatory and indicated as such, make sure all required fields are completed before proceeding.
Save
Click Save. This creates the user account and automatically sends them a welcome email with a unique link to join the platform.
What happens next
For the new user
- The user receives a welcome email with a unique link.
- They click the link, which takes them to create a password.
- Once their password is set, they can log in to WethosAI.
- They complete their profile, from LinkedIn or a short set of questions.
- Once their profile is set up, they have access to all platform functionality their license allows.
For you as Admin
The new user will appear in your Manage Members table with a Pending account status until they log in. Once they log in, their status changes to Active. If they don't log in within 14 days, their status changes to Expired and you'll need to resend a reactivation link.
You may also see additional tags under their name: Not Started (logged in but has not begun profile setup) or In Progress (started but not finished). They tell you where someone is in setup.
Tips
Create the group workspace they will work in before they arrive, so it is ready when they finish setting up.
Connect the integrations your organization uses (Google Drive, Microsoft 365, Slack) before inviting people, so the full platform is available from day one.
Share the Getting started guide along with the invitation, so people know what to expect.